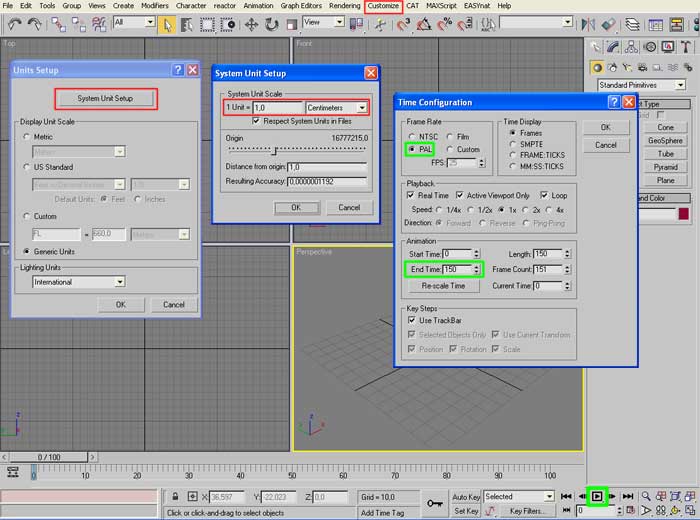
Open 3dsmax, go to Customize>Unit Setup>System Unit Setup and choose centimeters, later use a PAL frame rate and set the end time to 150, then click OK.
Create a plane object with position XYZ=0, Length/Width=150, segs=2 and rename it PlaneB.
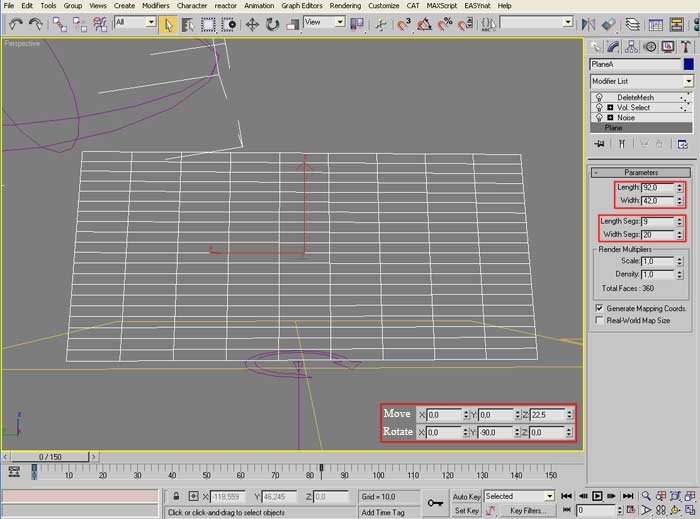
Create one more plane with XY=0 and Z=22,5 then set rotation Y= -90, Length=92 Widt=42, Length Segs=9 Width=20 and rename it PlaneA.
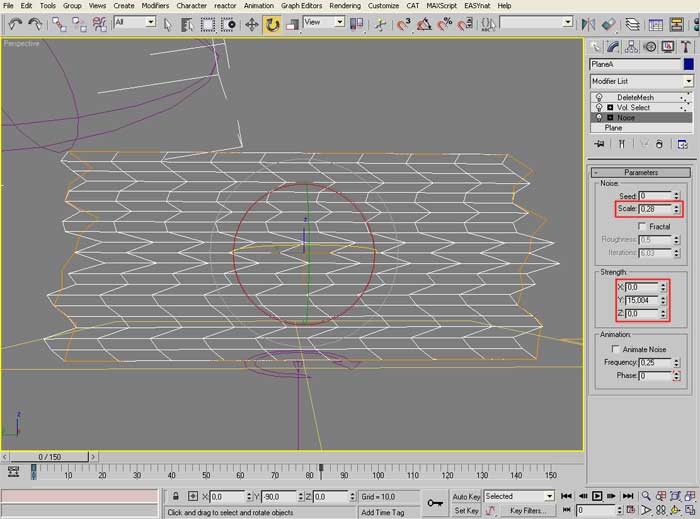
With PlaneA still selected go to Modify Panel and add a Noise modifier with scale=0,28, Y=15.
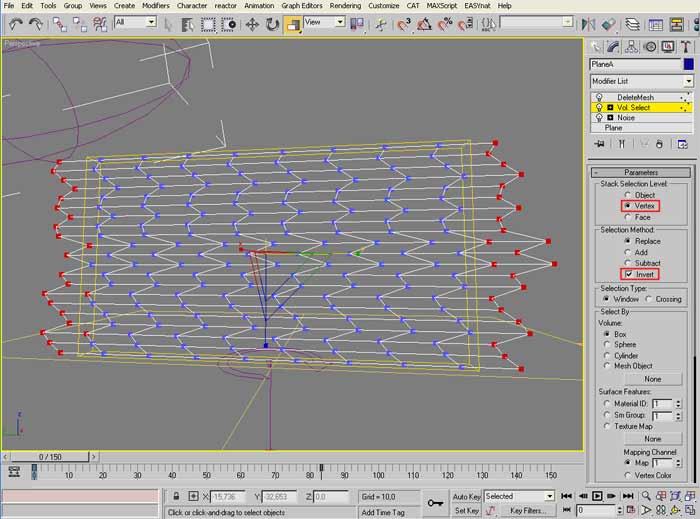
Now add a VolumeSelect modifier, select Vertex and activate the Invert option, then go in subobject mode and scale down the gizmo on Y axis until to obtain a result like the next image.
Lastly add a DeleteMesh modifier and that's all for this object.
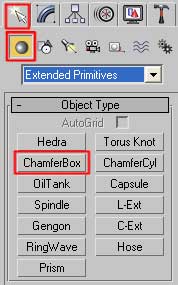
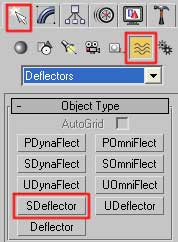
Come back to Create module and create a ChamferBox from ExtendedPrimitives with Length=10, Width=5, Heigth=2, Fillet=0,13 and position it where you want. Create a SDeflector from Spacewarp>Deflectors, set Diameter=30, scale Y=275 XZ=100, position X=0 Y=56 Z=58, rotation X= -10 YZ=0. |
 |
 |
Create a Wind from Spacewarp>Forces, set strength=0,15, turbolence=0,31, frequency=0,85, scale=0,15, make sure the arrow heads to the top.
Create a Vortex from Spacewarp>Forces with position XYZ=0, set axial drop=0, damping=1, orbital speed=0,39, damping=10, raidal pull=0,18, damping=1.
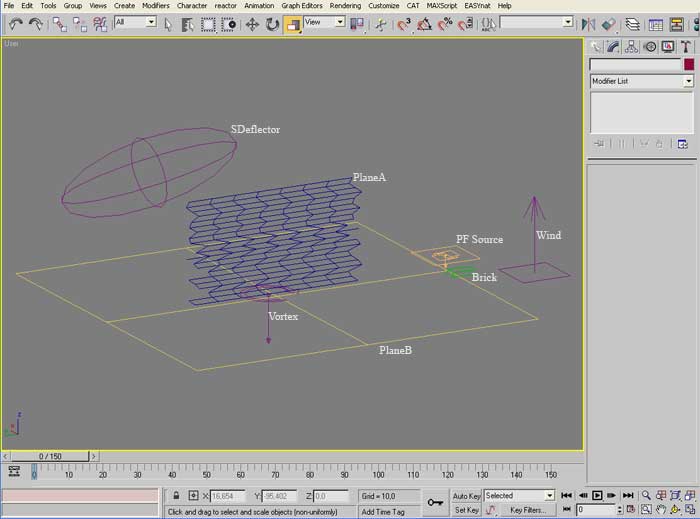
Now Open ParticelView (key 6), add an Empty Flow and close ParticleView.At this point the scene should look like the image below.
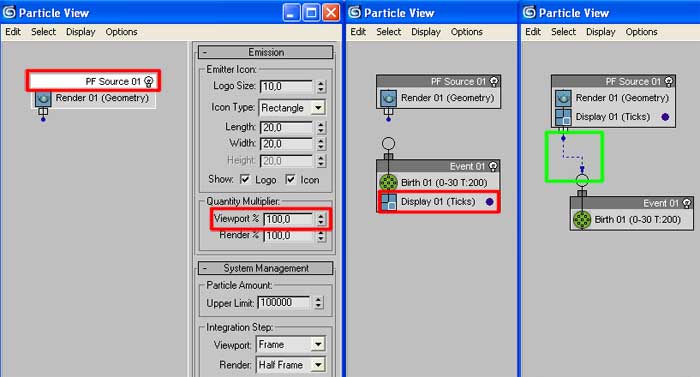
Initialising the ParticleFlow:Open the PreticleView, click on the PF Source01 event and set Viewport=100% in the Quantity Multiplier section.Moving out of the event righ click and add a Birth event from New>BirthEvent menù.Dragg the Display operator from the new event Event01 to the event PF Source01, now selecting the Display operator set Geometry from scroll downl menù Type and then link the two events throught the Wiring system.
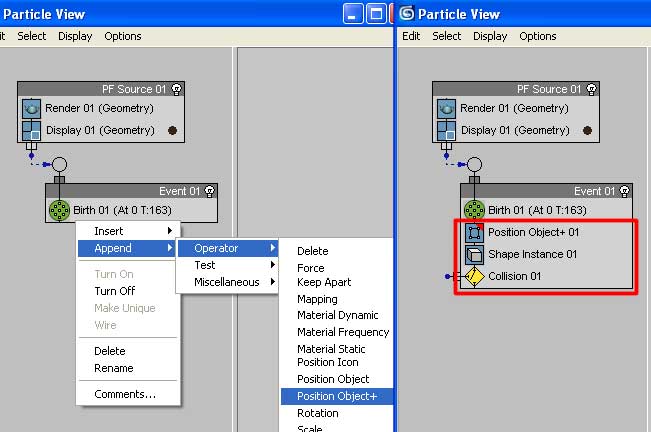
Rigth click into Event01, go to Append>Operator and select PositionObject+, repeat this operation and add Append>Operator>ShapeInstance and Append>Test>Collision obtaining somthing like the image below.
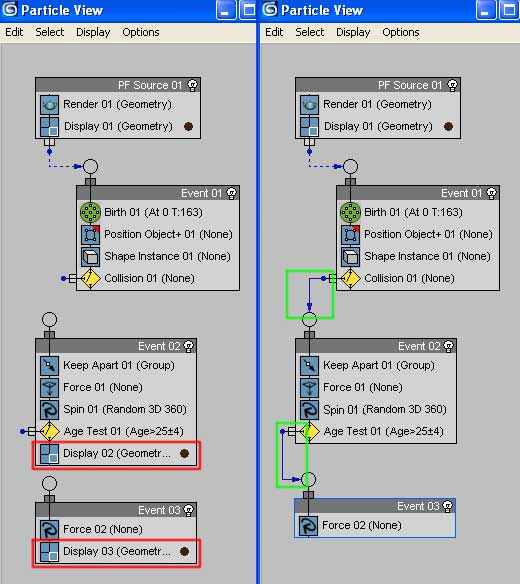
Rigth clicking out of the events add New>OperatorEvent>Force and automatically a new event Event02 is created , delete the Display operator selecting it and pressing Del on the keyboard.Into the Event02 rigth click and add an Append>Operator>Spin, Append>Operator>KeepApart and Append>Test>AgeTest.Moving again out of the events, rigth click and add a New>OperatorEvent>Force to create a new event Event03. From Event03 delete the Display operator and lastly complete the operations linking all with the Wiring system.
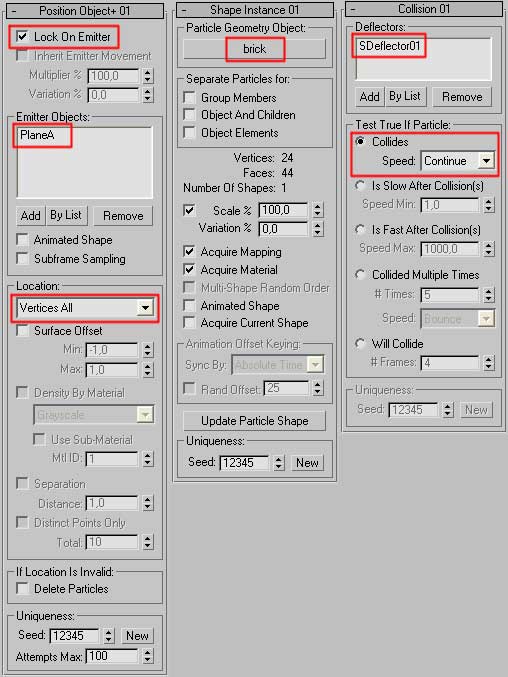
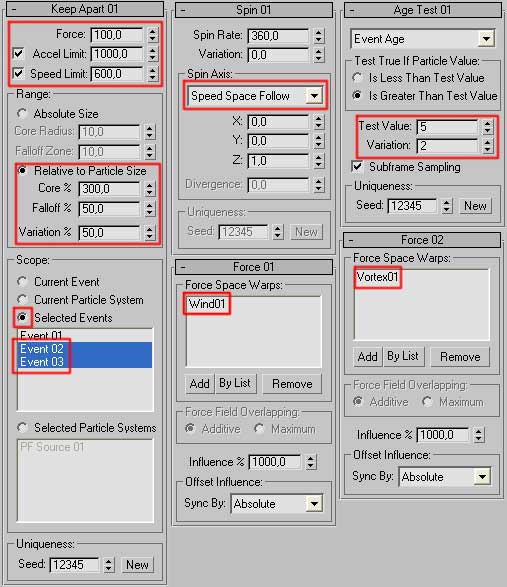
Now we have all the events and operators in the rigth position so we can set the operator parameters to complete the ParticleFlow initialization. You can take a look at the image below and make the same settings on your ParticleSystem.
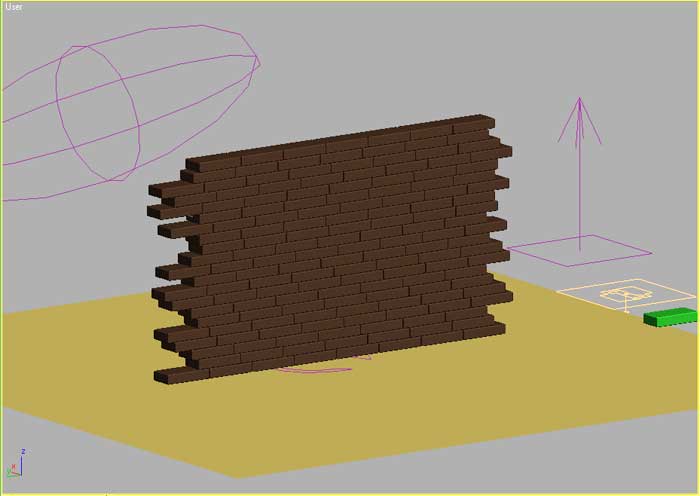
Finally it's time to close the ParticleView, to take a look at the scene and to save it, if the result is quite similar to the image below.
Animation:
Turn on the AutoKey in the lower rigth part of the screen, select the spacewarp SDeflector01, move the timeline at the frame 25, set position to X=1 Y= -19 Z=47, rotation X=10 YZ=0, move at the frame 50 and set position X=1 Y=15 Z=35, rotation X= -10 YZ=0, move at the frame 75 and set position X=1 Y= -26 Z=24, rotation X=10 YZ=0, move at the frame 100 and set position X=1 Y=13 Z=16, rotation X= -10 YZ=0, move at the frame 125 and set position X=1 Y= -10 Z=6, rotation XYZ=0.
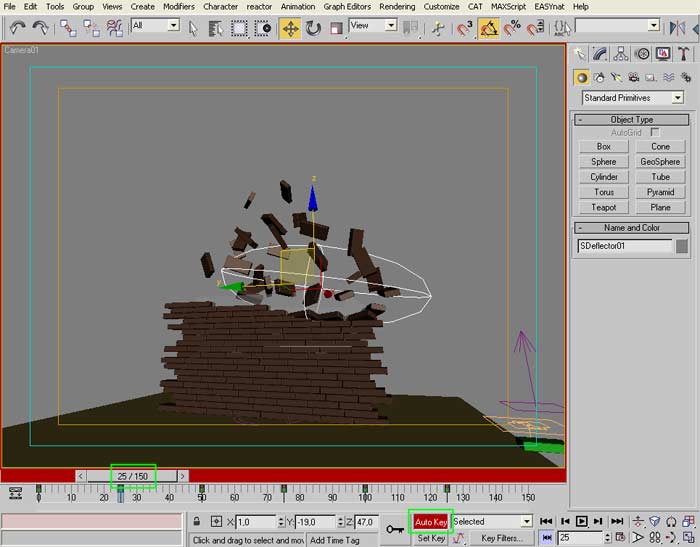
Now turn off the AutoKey, save the file, click on Play and look at the result. If everithing was rigth you'll have something like the upon image. Rigth click and download the tutorialEND file. Enjoy your wall destroyer!
Concevied and realized by Augusto Lombardi.