Initialising the scene:
| Open 3dsmax, create a cylinder and a box with the following parameters, no matter where they are generated but if they are not in the same place the scene remains more clear for the next steps. |  |
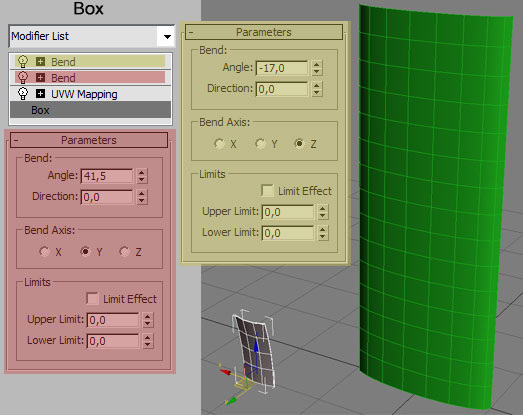
On the cylinder add an EditMesh, select from a top viewport half of the faces and delete them, select the remaining faces and scale them using the Parent Pivot orientation optin, for scale the gemoetry by the original pivot, taking care to flatten the geometry but avoiding to make it completely flat. Add a Bend modifier and in the subobjec mode chose Center, move the center gizmo a bit up along the Z axis, exit subobject mode and set the following parameters for the Bend modifier. Now select the box, add a UVW Mapping modifier, leave it as it comes, add 2 Bend modifiers.
|
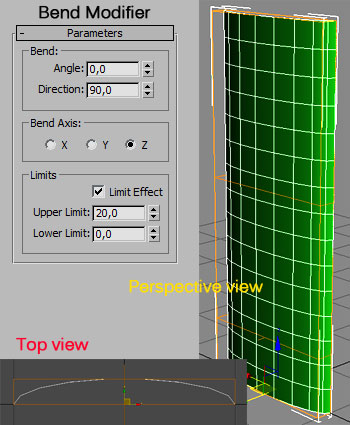 |
Follow the side image for the Bend settings and for the scene appearance. These modifiers parameters can be changed to modify the aspect of the result but it is better to understand the logic of this tutorial before. With these double bend we confere the tipical aspect of a feather to a standard box. Playing a bit with the box parameter we can decide how Hig is the resolution and dimension of our feather, with a bit of tricking is possible to optimize the number of polygons depending by the camera distance. |
 |
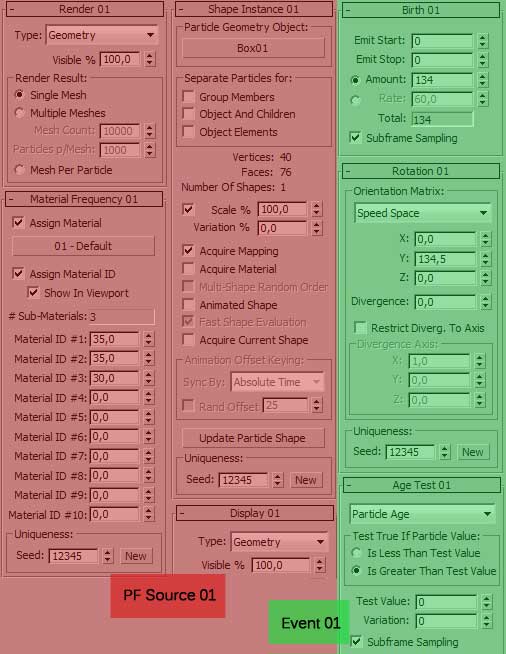
Now we can consider the scene geometries ready and we can start to create our particle system. Let's start opening the Particle View (press key 6) and from the depot (down left) drag and drop an Empty Flow operator in to the schematic view of Partilce Editor, select the resulting PF Source 01 event and into the left side of the Partilce Editor go to Quantity Multiplyer and set 100% for both render and viewport. Now following the side image let's add the other operators to the particle stack. In the next image you can find the settings for all the operators involved in this system. I placed different colors just to help you to don't confuse the operators settings for each Event. The order of the operators and event to respect is this one in the left. |
 |
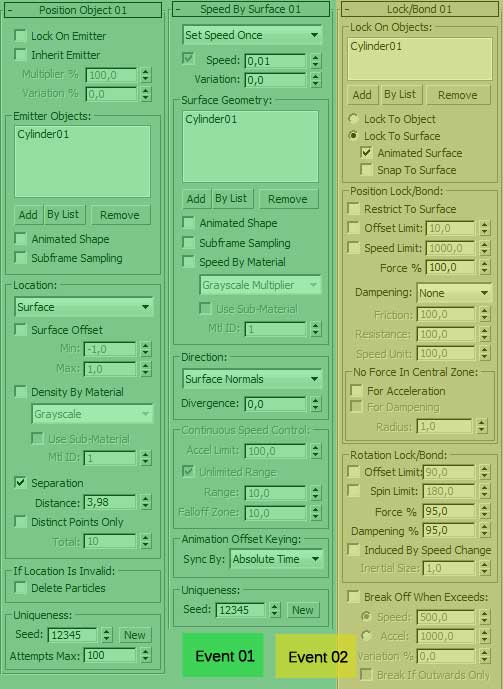
Red ones are for the PF Source 01 event In the operators Shape Instance you have to assign a geometry present in the scene so press "none" and select the Box01 object. In the Position Object, Speed by Surface and Lock/Bond operators you have to assign a geometry present in the scene so press "Add" and select the Cylinder01 object for each operator. We can leave the Material Frequency operator as in the figure for now, we will set a good material later. Once all these settings are done your system is ready to run. The main logic of this system works with the Speed by Surface operator that takes the information from the geometry normals and use it to give a speed and direction to the particles, putting a very low speed parameter with the SetSpeed Once optin we have te impression that the particles don't move. |
 |
Immediatly after we use a Rotate operator with the Speed Space option that reads the traiectory of the particles and orients them in the same direction of the motion with the option for correct this direction as we like. The AgeTest lets select all the particles and send to the Lock/bond as they get all these caracteristics. This setup needs to have at least one frame for the initialisation so use the frame 0 to adapt the particles on the geometry and start the real animation a bit after. Now you can save the scene. |
 |
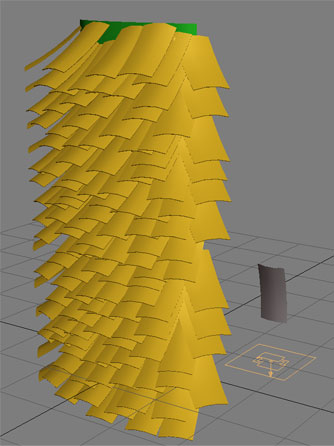
Play with the system: Select the cylynder01 object and go to the Bend modifier, activate the Auto Key botton, go to frame 20 and set 90 into the Bend angle, now you can turn off Auto Key. Ok now turn off AutoKey and press play. If everithing was done in the rigth way you can see a kind of feathers attached to the surface that changes his shape, you can notice that the feathers doesent behave rigidly but their connection with geometry has a kind of spring effect that make them more realistic. |
 |
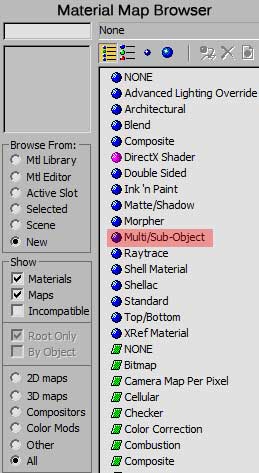
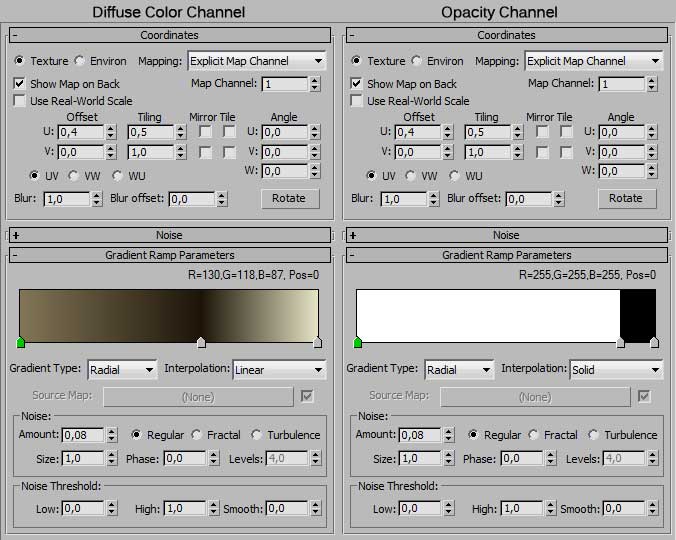
Just some steps more and we have it. Select the Box01 object and into the UVW Maps modifier set X as Alignment axis and after press Fit. Once these settings are made you can go to the root of the Multi Subobject Material and clone the first material in the list to the other two material slots changing the name of the material increasing numbering. |
 |
|
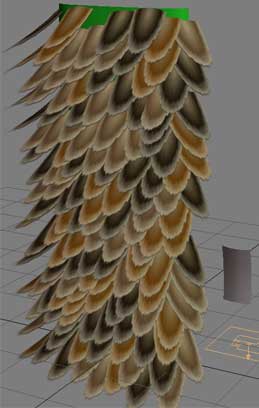
With the Material Editor still in the viewport open the Particle View again, select the Material Frequency operator, drag&drop the Multi Subobject Material just done from the Material Editor to the "none" botton of the operator and chose "instance" from the popup window. Make sure that the parameters of the operator are the same fo the image of some steps before and the system is complete. Example movie Just have fun!! At this link you can find a finished scene of the tutorial Rigth click&download Concevied and realized by Augusto Lombardi. |
 |